Treated surface
analysis/control method
Performance/Control
AMALPHA-treated surfaces can be controlled by several indicators to stabilize the quality.
The functionality of AMALPHA comes from a microscopically roughened metal surface profile, which can be numerically controlled using the amount of etching, L* value, and surface roughness. Numerical control allows the operator to detect signs of degraded treatment conditions and to maintain favorable surface treatment performance.
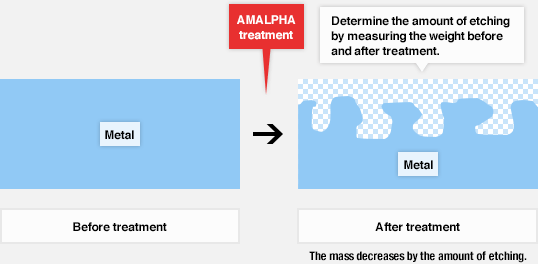
Measuring the amount of etching by weight-based method
It is possible to determine the amount of etching by measuring the weight of the workpiece before and after etching. Since AMALPHA treatment incorporates etching, it is of critical importance to conduct this measurement to determine whether or not the amount of etching is appropriate.
Measuring the amount of etching by weight-based method

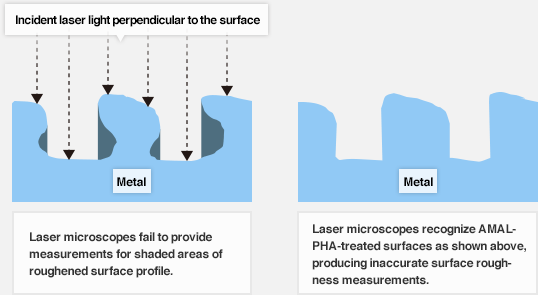
Surface roughness measurement using a laser microscope
Laser microscopes measure surface roughness by casting laser light perpendicularly to a metal surface as a substitute for a probe.
Since AMALPHA-roughened surface profiles look like an indented flask-like structure, laser microscopes are incapable of producing complete measurement results. Consequently, it is difficult to control treated surfaces simply by surface roughness data (Ra, Rz, etc.) obtained using a laser microscope, although such roughness data can be used as a supplementary control indicator. It is recommended to use it as a control indicator along with L* values and the amount of etching.
Surface roughness measurement using a laser microscope


